How to Choose the Right Brace Bolt in 2026?
Choosing the right Brace Bolt in 2026 requires more than matching a diameter to a product photo. The correct choice depends on load direction, brace material, connection geometry, installation access, and environmental exposure. A bolt supporting a timber brace beside the coast faces different demands from one used inside a dry warehouse. Salt air changes the corrosion risk. Tight spaces affect tool selection and tightening accuracy.
Start with verified measurements and the manufacturer’s technical data. Check bolt diameter, length, thread type, head design, material grade, and compatible nuts or washers. Confirm that the bolt suits the brace thickness without leaving excessive thread or insufficient engagement. Look for documented strength values, coating details, traceability, and testing information. Reliable suppliers should explain their specifications clearly, not hide them behind vague claims.
Field experience also matters. A bolt may meet a published rating, yet fail to suit the actual installation. Misaligned holes, damaged threads, or uneven bearing surfaces can reduce connection performance. Small details matter. In 2026, digital product records can improve purchasing decisions, but they cannot replace an on-site inspection. I have seen projects focus heavily on tensile strength while overlooking corrosion protection and access for maintenance. That is an easy mistake to repeat. This guide examines practical selection methods, common specification errors, and questions worth asking before installation. It does not replace an engineer’s design review where structural safety depends on the connection.
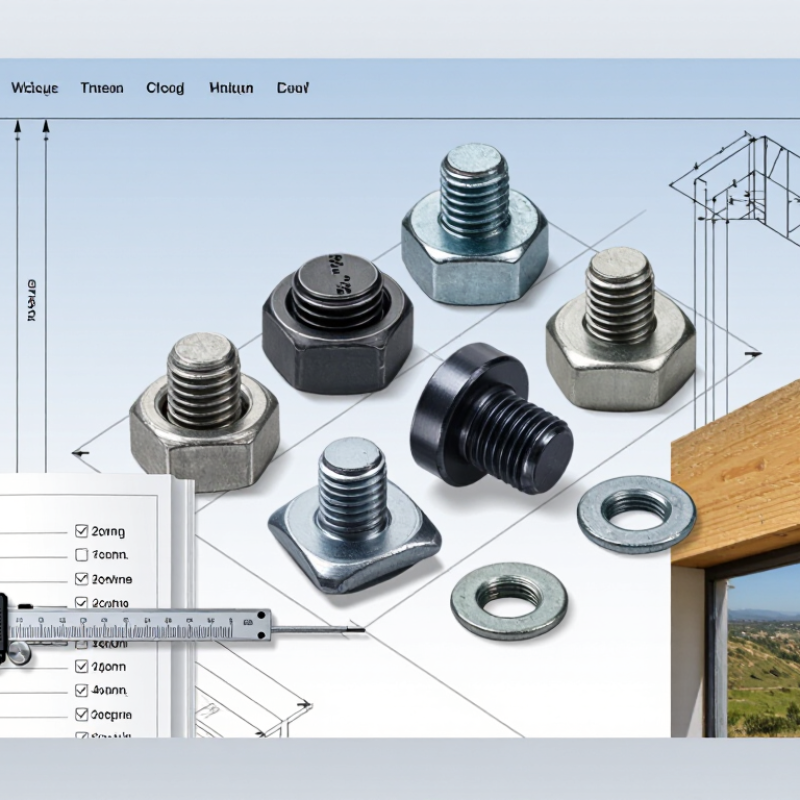
Define the Purpose and Load Requirements for a Brace Bolt
A brace bolt should be selected from the connection’s purpose, not from diameter alone. First, identify whether the brace resists tension, compression, vibration, or repeated seismic movement. A roof brace may need simple bearing strength, while a façade brace may require controlled pretension and slip resistance. The RCSC Specification for Structural Joints Using High-Strength Bolts (2020) separates bearing-type and slip-critical behavior, so the joint category must be defined before choosing the bolt.
Calculate the factored tension, shear, and combined loading from the latest structural drawings. AISC 360-22 requires checks for bolt tension, shear, bearing, tear-out, and connected-part failure. Do not check the bolt alone. For example, a 20 millimeter bolt may appear adequate, yet a thin gusset plate can deform around its hole. Hole diameter, edge distance, plate thickness, and load direction can control the design. Small details matter.
Installation conditions also affect performance. RCSC 2020 links slip resistance to bolt pretension and faying-surface conditions. Field dirt, paint thickness, and uneven contact can quietly reduce capacity. I have seen selections fail during review because the engineer used a catalog strength without confirming the actual joint. That shortcut is tempting, but incomplete. Recheck the load path, especially when braces reverse force during wind or seismic events. If the load history remains uncertain, request better project data before approving the bolt.
Compare Brace Bolt Materials, Grades, and Corrosion Resistance
How to Choose the Right Brace Bolt in 2026?
Compare Brace Bolt Materials, Grades, and Corrosion Resistance
Selecting a brace bolt starts with the service environment, not the lowest price. On a site inspection, I found surface rust around bolts installed near a cooling tower. The bolts had adequate strength, but poor corrosion protection. That shortcut was wrong. Moisture, salt spray, chemicals, and trapped water can reduce service life quickly.
Carbon steel bolts suit many indoor applications when protected with a suitable coating. Hot-dip galvanized bolts provide a thicker zinc layer for outdoor steelwork and humid locations. Stainless steel offers stronger corrosion resistance, especially where regular maintenance is difficult. However, stainless grades differ, and some perform poorly in chloride-rich conditions. Material compatibility also matters, because dissimilar metals may accelerate galvanic corrosion.
Grade selection should match the brace design loads and connection requirements. Check tensile strength, yield strength, thread condition, and the required safety factor. A higher grade is not automatically better. Excessive hardness can increase cracking risks in certain environments. Follow the project specification and confirm values through recognized mechanical standards or test certificates.
Inspect the bolt head markings, coating condition, and thread engagement before installation. Avoid damaged threads and unapproved substitutions. I would also review drainage details, because even a corrosion-resistant bolt can fail when water remains trapped around the connection. Field assumptions are tempting, but documented verification is safer.
How to Choose the Right Brace Bolt in 2026?
Compare common brace-bolt material options by approximate minimum tensile strength and indicative corrosion-resistance performance. Strength values are representative minimums for commonly specified grades; corrosion ratings are comparative guidance, not a substitute for project-specific testing or coating specifications.
Carbon and alloy steel grades provide high mechanical strength but generally require coatings or controlled environments for corrosion protection. Hot-dip galvanized steel improves outdoor durability, while 304 and 316 stainless steel provide substantially better inherent corrosion resistance. For marine, de-icing salt, or chloride-rich conditions, 316 stainless steel is typically preferred over 304 stainless steel.
Select the Correct Bolt Size, Thread Type, and Length
How to Choose the Right Brace Bolt in 2026?
Choosing a brace bolt starts with the connection, not the toolbox. Measure the existing hole, brace thickness, washers, and nut clearance. A bolt that looks close may still leave weak thread engagement. Select a diameter that fits the hole without excessive movement. For many metal braces, a snug fit improves load transfer and reduces rattling. However, the final size must match the engineer’s specification and the brace material.
Thread type matters just as much. Coarse threads usually handle dirt and minor damage better. Fine threads can provide more adjustment and stronger clamping in suitable applications. Never mix incompatible thread profiles. The nut should turn smoothly by hand before tightening. Length also deserves careful attention. Include the brace, washers, and nut when measuring. Leave enough thread beyond the nut, but avoid excessive projection that may catch clothing or tools. I sometimes find that the “standard” length is wrong after adding a thick washer.
Tips: Measure twice. Compare the old bolt only as a reference. Check thread engagement, corrosion, and edge distance before installation. Tighten with a calibrated tool when a torque value is specified. If the brace carries significant structural loads, have a qualified professional verify the diameter, grade, and installation method. A clean appearance is useful, but it does not prove a secure connection.
Check Compatibility with Braces, Nuts, Washers, and Tools
How to Choose the Right Brace Bolt in 2026?
A brace bolt must match the brace hole, nut, washer, and installation tool. Measure the hole diameter, brace thickness, and connection length before ordering. A bolt that is too short cannot develop full thread engagement. A bolt that is too long may interfere with movement or nearby steel. I check the actual brace, not only the drawing. Site dimensions are often imperfect.
Material strength also matters. ISO 898-1 class 8.8 bolts have a minimum tensile strength of 800 MPa. Class 10.9 bolts reach 1,000 MPa, but higher strength does not automatically mean better performance. The bolt, nut, and washer should follow a compatible specification. ASTM F3125/F3125M covers structural bolt grades commonly used in steel connections. Mixing property classes can create uneven tightening and premature thread damage.
Washers need the correct outer diameter and hardness for the brace slot or oversized hole. A standard nut may not suit a structural bolt or a locking requirement. Check the required wrench size before installation. Some tools cannot fit between narrow brace members. RCSC 2020 guidance distinguishes snug-tightened and pretensioned joints, so the required method must be confirmed. Torque alone can mislead because friction changes results. I still recheck the fit after tightening. That step feels slow, but it catches costly mistakes. Reference the latest project specification, ASTM requirements, ISO 898-1, and the RCSC Specification before approval.
Verify Safety Standards, Installation Conditions, and Maintenance Needs
How to Choose the Right Brace Bolt in 2026?
A brace bolt should match the joint, load, and surrounding material. Check its rated strength, diameter, thread length, and corrosion protection. Confirm that its documentation identifies material grade, test results, and applicable safety standards. Do not rely on appearance alone. A bright finish does not prove structural reliability. Ask whether the bolt meets current regional requirements and project specifications. Requirements can change.
Installation conditions matter as much as bolt selection. Measure the brace thickness, hole diameter, edge distance, and access space before ordering. The bolt must sit squarely, without forcing misaligned members together. Tightening should follow the specified torque, using a calibrated tool when possible. Over-tightening may crush timber or deform thin metal. Under-tightening can allow movement and noise. I have seen small alignment errors create larger maintenance problems later. Still, field conditions are rarely perfect, so record any adjustment and obtain qualified approval when the design changes.
Tips
Inspect threads and washers before installation. Keep contact surfaces clean and dry. Mark the final torque and installation date. Check for rust, looseness, cracking, or displaced washers during routine inspections. Recheck joints after severe weather, vibration, or nearby construction. Replace damaged hardware with matching specifications, not merely a similar size. One caution remains: corrosion protection can hide early surface damage, so visual checks alone are not enough. Use measurement and professional judgment.





 Send Email
 Phone
 whatsapp
 Wechat
 Whatsapp
